The Honey Self-assessment is highly customizable and configurable to match the needs of your study or program. In this guide, we’ll explain what options are available in Honey’s admin settings and how you can expect them to display on the widget. Note that Self-assessment customizations can be set on a study-wide basis or by language/locale.

Study-wide options:
- Welcome image – The welcome image is displayed at the top of the optional Welcome Page that is displayed at the beginning of the questionnaire, if enabled.

To upload an image, email your selected image in 930 x 260 px size and PNG format to Trialbee at support@trialbee.com. We need a day or 2 to add the image.
- Set custom font – Changes the font displayed on the Self-Assessment widget. By default, the font is set to Poppins.
- Custom font URL – Enter a URL where the custom font is hosted to complete the font configuration.
- Set main color – This setting applies branded color options to the Self-Assessment widget’s main user interface elements (buttons, heading, and question answers). The color can be set using a color picker or by entering RGG, HEX or HSL values.
- Set light color - This setting applies lighter branded color to the Self-Assessment widget’s user interface elements. The color can be set using a color picker or by entering RGB, HEX or HSL values.

- Contact form options – Enables or disables the options available for candidate input on the Contact page of the Self-assessment. Options include:
- Name – a single field where candidates choose what to enter (first name only or first and last name)
- Email – request the candidate to enter their email address
- Email confirm (not recommended) – click to ask the candidate to re-enter their email address
- Phone – request the candidate to enter their phone number
- Phone confirm (not recommended) – click to ask the candidate to re-enter their phone number
- Postal Code – ask for the candidate’s postal/ZIP code. Required if not using the site selector step, connects a candidate to the closest available site by distance
- Preferred Contact Hours – let the candidate select time frame preferences for contacts (standard options are: anytime, 8am-12pm, 12pm-4pm, and 4pm-8pm).

- Preferred Contact Way – let the candidate select contact method preferences for contacts (standard options are: phone, email, SMS, and WhatsApp).

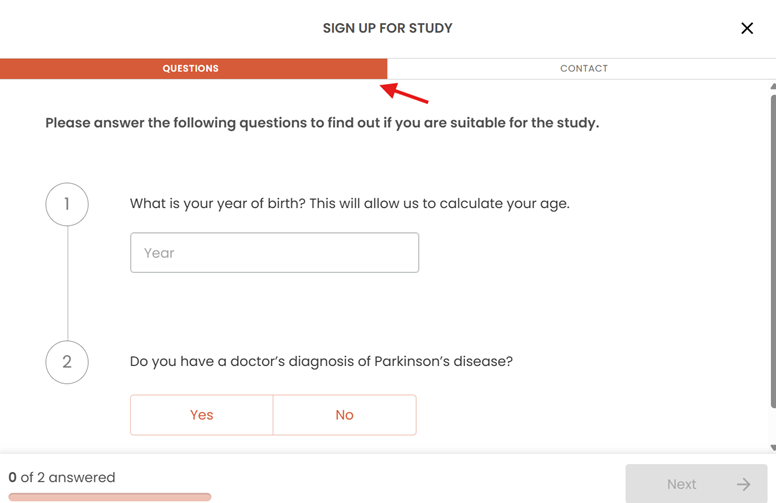
- Steps – Define what pages will appear on the Self-assessment widget and in what order they appear. Clicking the checkbox next to the name of the step will enable it on the widget and clicking the up or down arrows will adjust the order in which that step appears. Step options include:
- Welcome page (not recommended) – display the welcome image and any IRB/EC approved introduction text you may want to include for candidates prior to beginning the questionnaire. Requires an image.
- Questionnaire (required) – the Self-assessment questions configured in Honey
- Eligible (not recommended) – a page shown to the candidate if they pass the questionnaire, but before the contact information page is shown
- Site selector (optional) – allows candidates to select the research site of their choice based on a map and a list sorted by distance
- Contact details (required) – the page where a candidate will enter their contact information, including postal code to determine a nearby site if the site selector is not used. Contact information fields are set in the contact form options.
- Completed Page (required) – indicates to a candidate that their Self-assessment is complete and can display any IRB/EC approved messages you wish to convey. We recommend including who the candidate will hear from next and when they should expect to be contacted. *Bonus* include the phone number that they will get the call from.
- Autoscroll (recommended) – Toggling Autoscroll on will allow the widget to scroll down the page as the candidate answers the Self-Assessment questions automatically.
Locale options:
If your study is supporting multiple languages or countries, any of the above options can be configured on a locale-by-locale basis. For example, if you need to display a different welcome image based on country, you can upload an image specifically for that locale and it will override the welcome image set study-wide.
- Messages – Sets the custom text options for the Self-assessment widget’s default elements. A full list of customizable text options can be found in this section. Note different locales may require different custom text based on differences in language translations. This is the area where you can modify our standard language such as: changing “SMS” to “text message”, or “clinic” to “research center”.
Was this article helpful?
That’s Great!
Thank you for your feedback
Sorry! We couldn't be helpful
Thank you for your feedback
Feedback sent
We appreciate your effort and will try to fix the article